Every air fryer owner has had the same experience: you throw something in, guess a time and temperature, and either pull out a blackened crisp or a soggy, undercooked disappointment. Air fryers cook faster than conventional ovens — typically 20-25% quicker — but the exact timing depends on your specific model, the quantity of food, and whether you remembered to preheat.
This guide gives you reliable starting times for the most common foods cooked in UK air fryers. We tested each timing across four popular models — Ninja, Cosori, Tower, and Philips — to give you ranges that work regardless of your machine. Adjust up or down based on your machine and how crispy you like things.
How Air Fryer Timing Works
Before the charts, a few principles that apply to everything:
Air fryers vary. A Ninja Dual Zone cooks differently from a Cosori, which cooks differently from a Tower. The timings below are ranges — start at the lower end and check. You’ll learn your specific machine’s quirks within a week.
Don’t overcrowd the basket. This is the most common timing mistake. Air fryers work by circulating hot air around the food. If the basket is packed, air can’t circulate, and you get steamed food with crispy edges and soft centres. One layer, with space between items, every time.
Shake or flip halfway. Most foods benefit from a shake (chips, veg) or flip (chicken, fish) at the halfway point. This ensures even cooking and browning on all sides.
Preheat for 3-5 minutes. Not all models need preheating, but most cook more evenly when you do. Run the air fryer empty at your target temperature for 3-5 minutes before adding food.
A light spray of oil makes everything better. Air fryers aren’t technically “frying” — they’re convection cooking. A light mist of oil (olive oil spray, or a reusable oil spray bottle filled with rapeseed oil) adds crispness and flavour that dry cooking can’t match.
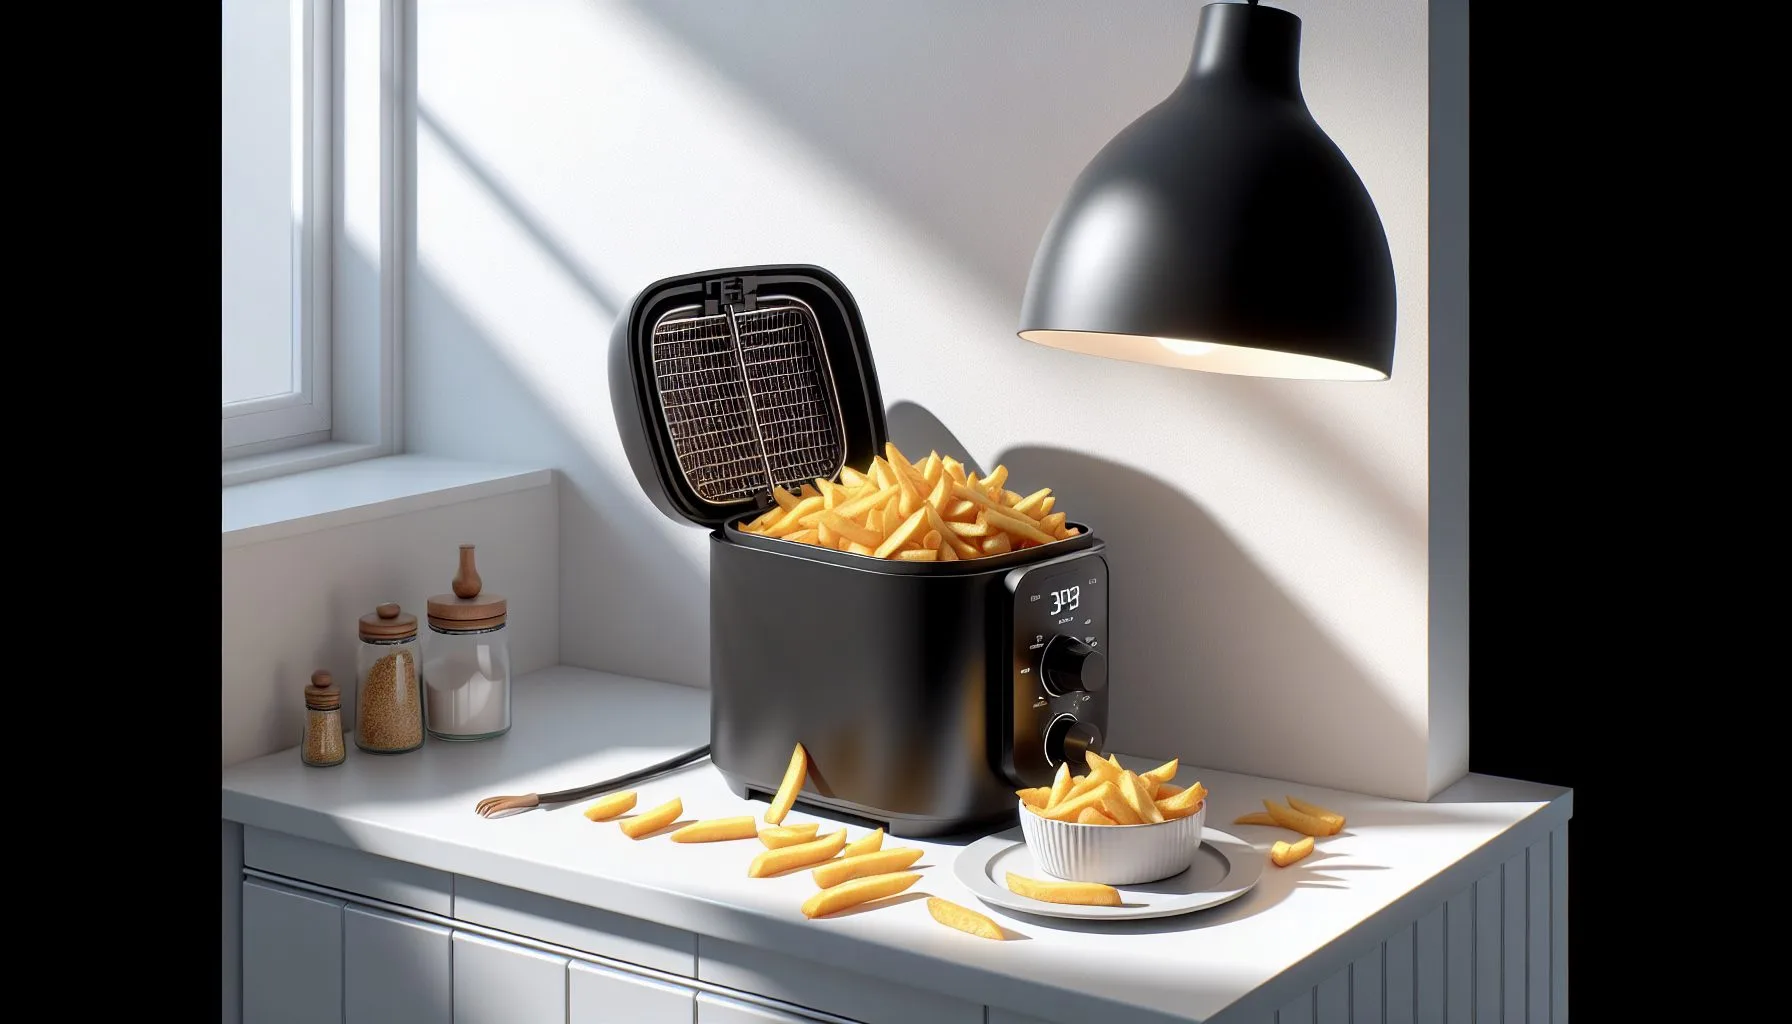
Chips and Potatoes
The air fryer’s signature dish. Getting chips right is the difference between loving your air fryer and thinking it was a waste of money.
Frozen Chips
| Type | Temperature | Time | Notes |
|---|---|---|---|
| Thin/shoestring | 190°C | 10-14 min | Shake at 7 min |
| Standard oven chips | 200°C | 15-20 min | Shake at 10 min |
| Thick-cut/chunky | 200°C | 18-24 min | Shake at 12 min |
| Sweet potato fries | 190°C | 12-16 min | Shake at 8 min |
| Curly fries | 200°C | 10-14 min | Shake at 7 min |
| Hash browns | 180°C | 10-14 min | Flip at 7 min |
| Potato waffles | 200°C | 8-12 min | Flip at 5 min |
Fresh Chips (Homemade)
Fresh chips need a bit more preparation for the best results:
1. Cut potatoes into your preferred chip size (Maris Piper or King Edwards work best) 2. Soak in cold water for 30 minutes (removes excess starch = crispier chips) 3. Drain and pat completely dry with a tea towel 4. Toss in 1-2 teaspoons of oil and a pinch of salt
| Type | Temperature | Time | Notes |
|---|---|---|---|
| Thin chips (1cm) | 190°C | 15-18 min | Shake at 8 and 12 min |
| Standard chips (1.5cm) | 200°C | 18-22 min | Shake at 10 and 15 min |
| Chunky chips (2cm+) | 200°C | 22-28 min | Shake at 12 and 18 min |
Other Potato Dishes
| Dish | Temperature | Time | Notes |
|---|---|---|---|
| Jacket potato (medium) | 200°C | 40-50 min | Prick skin, rub with oil and salt |
| Roast potatoes (parboiled 8 min) | 200°C | 20-28 min | Toss in oil, shake at 12 min |
| Wedges (fresh) | 200°C | 18-22 min | Toss in oil + seasoning |
| Baby new potatoes (halved) | 190°C | 16-20 min | Toss in oil, herbs |
| Hasselback potatoes | 190°C | 30-38 min | Fan cuts, brush with butter |
Chicken
Chicken is where air fryers really shine — crispy skin, juicy inside, fraction of the oven time.
| Cut | Temperature | Time | Notes |
|---|---|---|---|
| Breast (boneless, 170g) | 190°C | 16-20 min | Flip at 10 min. Internal temp: 75°C |
| Breast (bone-in) | 180°C | 22-28 min | Flip at 14 min |
| Thighs (bone-in, skin-on) | 200°C | 22-26 min | Skin side up, flip at 14 min |
| Thighs (boneless) | 190°C | 14-18 min | Flip at 9 min |
| Drumsticks | 200°C | 18-22 min | Turn at 10 min |
| Wings | 200°C | 20-25 min | Shake at 10 and 16 min |
| Chicken Kiev (frozen) | 180°C | 18-22 min | Flip at 10 min, careful not to burst |
| Chicken goujons (frozen) | 200°C | 10-14 min | Shake at 7 min |
| Chicken nuggets (frozen) | 200°C | 8-12 min | Shake at 5 min |
| Whole chicken (1.5kg) | 180°C | 55-65 min | Breast down first 30 min, flip |
Safety note: Always check chicken has reached 75°C internal temperature with a meat thermometer, in line with Food Standards Agency guidelines. This isn’t optional — undercooked chicken is a real food safety risk. A digital meat thermometer costs £8-15 and is worth every penny.
Beef and Lamb
| Cut | Temperature | Time | Notes |
|---|---|---|---|
| Burger (fresh, 150g) | 190°C | 10-14 min | Flip at 6 min. 71°C for well done |
| Burger (frozen) | 190°C | 14-18 min | Flip at 8 min |
| Steak (2cm thick, medium-rare) | 200°C | 7-9 min | Flip at 4 min. Rest 5 min after |
| Steak (2cm thick, medium) | 200°C | 10-12 min | Flip at 5 min. Rest 5 min |
| Meatballs (fresh) | 190°C | 10-14 min | Shake at 7 min |
| Lamb chops | 200°C | 10-14 min | Flip at 6 min |
| Sausages (fresh pork) | 180°C | 12-16 min | Turn at 6 and 10 min |
| Sausages (frozen) | 180°C | 15-18 min | Turn at 7 and 12 min |
Fish and Seafood
| Item | Temperature | Time | Notes |
|---|---|---|---|
| Salmon fillet (150g) | 200°C | 8-12 min | Skin side down, no flip needed |
| Cod fillet | 200°C | 10-12 min | Season well, light oil spray |
| Fish fingers (frozen) | 200°C | 8-12 min | Flip at 5 min |
| Breaded fish fillet (frozen) | 180°C | 12-16 min | Flip at 8 min |
| Prawns (raw) | 200°C | 5-8 min | Shake at 4 min |
| Scampi (frozen) | 200°C | 8-12 min | Shake at 5 min |
| Calamari (breaded) | 200°C | 6-9 min | Shake at 4 min |
Vegetables
Air-fried vegetables are a revelation if you’ve only ever boiled or steamed them. If you want full recipe ideas rather than just timings, check our air fryer recipes for beginners. Toss in a light coating of oil and they come out caramelised, slightly charred, and deeply flavoured.
| Vegetable | Temperature | Time | Notes |
|---|---|---|---|
| Broccoli florets | 190°C | 6-9 min | Toss in oil, shake at 4 min |
| Brussels sprouts (halved) | 190°C | 12-16 min | Toss in oil + balsamic, shake at 8 min |
| Cauliflower florets | 190°C | 10-14 min | Oil + cumin = incredible |
| Courgette (sliced) | 190°C | 8-10 min | Light oil, single layer |
| Peppers (chunked) | 190°C | 8-12 min | Great for fajitas |
| Mushrooms (quartered) | 190°C | 6-8 min | Oil + garlic, shake at 4 min |
| Aubergine (cubed) | 200°C | 12-16 min | Needs more oil than most veg |
| Asparagus | 190°C | 6-8 min | Snap woody ends first |
| Corn on the cob | 200°C | 12-16 min | Brush with butter, turn at 8 min |
| Cherry tomatoes | 180°C | 8-10 min | Burst and caramelise beautifully |
| Butternut squash (cubed) | 190°C | 14-18 min | Toss in oil + herbs, shake at 10 min |
| Sweet potato (cubed) | 190°C | 14-18 min | Oil + smoked paprika |
| Green beans | 190°C | 7-10 min | Oil + garlic, shake at 5 min |
| Onion rings (frozen) | 190°C | 6-10 min | Shake at 4 min |
Frozen Convenience Food
The air fryer’s guilty pleasure. Everything from the freezer section cooks faster and crispier than in the oven.
| Item | Temperature | Time | Notes |
|---|---|---|---|
| Pizza (frozen, personal) | 180°C | 6-10 min | Check at 6 min, cheese should bubble |
| Pizza rolls / bites | 190°C | 6-8 min | Shake at 4 min |
| Spring rolls (frozen) | 190°C | 8-12 min | Flip at 5 min |
| Samosas (frozen) | 180°C | 8-12 min | Flip at 5 min |
| Mozzarella sticks | 190°C | 6-8 min | Single layer, watch closely |
| Fish cakes (frozen) | 180°C | 12-16 min | Flip at 8 min |
| Sausage rolls (frozen) | 200°C | 12-16 min | Check pastry at 10 min |
| Pigs in blankets | 190°C | 12-16 min | Shake at 8 min |
| Scotch eggs | 180°C | 14-18 min | Turn at 8 min |
| Garlic bread (frozen) | 180°C | 5-8 min | Watch closely, burns fast |
| Chicken pie (individual) | 180°C | 16-20 min | Cover pastry if browning too fast |
Baking and Breakfast
| Item | Temperature | Time | Notes |
|---|---|---|---|
| Toast | 180°C | 3-5 min | Flip at 2 min |
| Bacon | 200°C | 6-10 min | No oil needed, check at 6 min |
| Eggs (fried, in ramekin) | 170°C | 5-7 min | Spray ramekin with oil |
| Croissants (frozen) | 170°C | 8-10 min | Don’t overcrowd |
| Banana bread (small loaf) | 160°C | 25-30 min | Use a silicone loaf tin |
| Cookies | 160°C | 8-10 min | Parchment paper on base |
| Scones | 180°C | 10-14 min | Brush tops with milk or egg wash |
| Yorkshire puddings | 200°C | 12-16 min | Preheat tin with oil in fryer |
Timing Troubleshooting
Food is cooked outside but raw inside: – Temperature too high. Drop by 10-20°C and increase time – Food is too thick. Cut into smaller, more even pieces – Basket overcrowded. Cook in smaller batches
Food is dry or tough: – Temperature too high or time too long – Not enough oil — a light spray makes a big difference – Chicken breast particularly dries out — consider brining for 30 minutes before cooking (dissolve 1 tablespoon salt in 500ml water, soak the chicken, pat dry)
Food isn’t crispy: – Didn’t preheat the air fryer – Too much food in the basket (steaming instead of frying) – Food was wet — always pat dry before cooking – No oil spray — even a light mist helps enormously
Cooking times vary wildly from this guide: – Your air fryer may run hot or cool. Use an oven thermometer (£5) to check actual vs displayed temperature – Basket size matters — a 3.2L basket heats differently from a 5.5L basket – Altitude doesn’t affect air fryers (unlike ovens), but ambient kitchen temperature does slightly
Making the Most of Your Air Fryer
Accessories Worth Buying
- Silicone liners (£5-8) — easier to clean than parchment paper, reusable
- Meat thermometer (£8-15) — essential for chicken, useful for everything
- Oil spray bottle (£5-10) — refillable, better coverage than drizzling
- Silicone tongs (£5-8) — for flipping without scratching the basket coating
- Cake barrel / baking tin (£8-12) — for cakes, quiches, and frittatas
Cleaning
Clean the basket after every use. Most baskets are dishwasher-safe, but hand washing with hot soapy water and a non-abrasive sponge extends the non-stick coating’s life. Never use metal utensils or scourers on the basket.
Wipe the inside of the main unit with a damp cloth weekly to remove grease splatter. A buildup of grease eventually smokes at high temperatures — not dangerous but unpleasant.
Air Fryer Accessories Worth Buying (and Which to Skip)
Walk through the kitchen aisle at any supermarket and you will find dozens of air fryer accessories competing for your attention. Some genuinely improve your results. Most are unnecessary clutter that will end up at the back of a cupboard. Here is what is actually worth the money.
Silicone liners are the single best accessory you can buy. They stop food sticking, protect the non-stick coating on your basket, and make cleaning noticeably easier. A pack of reusable ones costs around four to six pounds and lasts months. They are dishwasher-safe and far more practical than disposable paper liners, which tend to blow around inside the basket during cooking.
A small wire rack or trivet lets you cook on two levels in larger air fryers. This is really useful when you want to cook meat and vegetables simultaneously without crowding the basket. Stack racks from brands like Tower and Ninja cost about eight to twelve pounds and pay for themselves quickly by saving you running the air fryer twice.
A kitchen thermometer removes all guesswork from meat cooking. The timing charts above are reliable starting points, but thickness varies between pieces. A digital probe thermometer (about ten pounds from Amazon) tells you instantly whether that chicken thigh has reached the safe internal temperature of 75 degrees Celsius recommended by the Food Standards Agency. No more cutting into meat to check.
Skewer sets and small baking tins expand what your air fryer can do. Metal skewers let you make kebabs and satay. Small round cake tins (about fifteen centimetres across) fit inside most air fryer baskets and work brilliantly for frittatas, small cakes, and egg bites.
What to skip: Dedicated air fryer cookbooks are mostly available free online — the recipes work the same way. Pre-made spice kits marketed as air fryer seasonings are just regular seasonings in fancier packaging. And those multi-piece accessory sets you see on Amazon for twenty pounds? They contain about three useful items and seven that go straight in the drawer.
Common Air Fryer Mistakes That Ruin Results
If your air fryer results have been disappointing, chances are you are making one of these common mistakes. The good news is they are all easy to fix.
Overcrowding the basket is the number one problem. Air fryers work by circulating hot air around food at high speed. Pack the basket full and the air cannot flow properly, leaving you with food that is soggy on one side and crispy on the other. Cook in batches rather than piling everything in. Yes, it takes a bit longer. The results are worth it.
Not preheating makes a bigger difference than most people realise. Running the air fryer empty at cooking temperature for three minutes before adding food gives you a much better sear and crispier results, especially with chips, chicken wings, and anything breaded. Most modern air fryers have a preheat function — use it.
Forgetting to spray oil is another common one. Air fryers need less oil than deep frying, but they still need some for proper browning and crispness. A light spray of olive oil or rapeseed oil before cooking makes a noticeable difference, particularly on vegetables and breaded items. Invest in a refillable oil spray bottle rather than buying aerosol versions, which often contain propellants that damage non-stick coatings.
Using wet batter does not work in air fryers. Traditional fish and chip shop batter needs to be submerged in oil to set. In an air fryer, wet batter just drips off and makes a mess. Stick to dry coatings like breadcrumbs, panko, or seasoned flour for crispy results without the drama.
Batch Cooking and Meal Prep in an Air Fryer
One of the most practical uses for an air fryer that people overlook is batch cooking. Spending an hour on a Sunday afternoon prepping the week’s protein saves both time and money during busy weekday evenings.
Chicken thighs are ideal for batch cooking — cook six at 190°C for 22-25 minutes, then slice and store in the fridge for up to four days. They’re perfect cold in salads, reheated in wraps, or tossed into a stir-fry. We found that skin-on thighs reheat far better than breast, which tends to dry out on the second heat.
Roasted vegetables also batch brilliantly. Peppers, courgettes, aubergine, and sweet potato all hold up well in the fridge for three to four days. Cook at 180°C for 12-15 minutes, slightly underdone, so they’re not mushy when reheated. Season simply with olive oil, salt, and garlic granules — you can add different sauces later to keep things interesting through the week.
Falafel and veggie burgers are another batch-friendly option. Make a big batch from scratch or buy them chilled from Sainsbury’s or Tesco and cook in the air fryer at 180°C for 10-12 minutes. They freeze well after cooking — reheat from frozen at 160°C for 6-8 minutes and they taste almost as good as fresh.
The key to successful air fryer batch cooking is labelling. Use masking tape and a marker to write the date and reheating instructions on each container. It takes ten seconds and prevents the mid-week mystery tub situation that leads to takeaway ordering.
The Bottom Line
Air fryer cooking times aren’t an exact science — they’re a starting point that you adjust based on experience with your specific machine. If you’re looking to upgrade or buy your first air fryer, our best air fryers 2026 guide can help. Start at the lower end of these ranges, check for doneness, and add time if needed. After a week of using these charts, you’ll have a feel for your air fryer’s personality and won’t need to look things up.
The single best tip: cook in single layers and shake or flip halfway. That alone fixes 80% of air fryer disappointments. Everything else is fine-tuning.