You’ve spent £15 on a bag of speciality coffee beans, dialled in your grind, and brewed a lovely shot — but the latte you pour looks nothing like the one from your local café because the milk is flat, hot, and lifeless. The good news is you don’t need a £500 espresso machine with a steam wand to froth milk properly. Several cheaper methods produce café-quality microfoam, and some of them cost less than a takeaway coffee.
For the machine side of the decision, read Coffee Machine Types Explained: Bean-to-Cup, Pod, Filter & Espresso and Best Pod Coffee Machines 2026 UK: Nespresso & Dolce Gusto.
For broader appliance planning, see Kitchen Gadgets That Are Actually Worth the Drawer Space.
In This Article
- What Makes Good Milk Foam
- Method 1: Handheld Milk Frother
- Method 2: French Press
- Method 3: Electric Milk Frother Jug
- Method 4: Jar and Microwave
- Method 5: Stovetop and Whisk
- Which Milk Works Best
- Plant Milk Frothing Guide
- Temperature Matters More Than You Think
- Latte Art Without a Steam Wand
- Frequently Asked Questions
What Makes Good Milk Foam
Before diving into methods, understanding what you’re trying to achieve makes everything easier.
Microfoam vs Dry Foam
There are two types of milk foam. Dry foam is the stiff, bubbly stuff that sits on top of a cappuccino like a meringue — large bubbles, thick texture, separates from the milk. Microfoam is the silky, glossy texture used in flat whites and latte art — tiny bubbles so small you can barely see them, integrated throughout the milk rather than sitting on top.
Most home frothing methods produce dry foam. The techniques below focus on getting closer to microfoam, which is what makes a coffee drink taste professional rather than homemade.
The Science
Milk contains proteins (casein and whey) that stabilise air bubbles. When you introduce air into heated milk, these proteins unfold and wrap around the bubbles, trapping them. Fat adds richness and mouthfeel but actually makes bubbles less stable — which is why skimmed milk froths easily but whole milk tastes better.
The sweet spot for frothing temperature is 55-65°C. Below 55°C, the proteins don’t unfold properly. Above 70°C, they start to break down (denature), the milk scalds, and you get that burnt taste that ruins the drink. After ruining several jugs of milk by overheating, I now use a kitchen thermometer every time — it’s the single biggest improvement you can make.
Method 1: Handheld Milk Frother
What You Need
A battery-powered or rechargeable handheld frother (about £5-15 from Argos, Amazon UK, or Lakeland). These are the small wand-style devices with a spinning whisk head.
How to Do It
- Heat your milk to 60-65°C — use a microwave (about 45-60 seconds for a mug, checking every 15 seconds) or a small saucepan on medium heat
- Pour the hot milk into a tall, narrow vessel — a jug or large mug. Fill no more than halfway (the milk will expand)
- Insert the frother at an angle, just below the surface
- Turn it on and hold it near the surface for 5-10 seconds to introduce air — you’ll hear a gentle hissing sound
- Once you have enough volume, plunge the frother deeper and angle it to create a whirlpool. This breaks up large bubbles into smaller ones
- Continue for 15-20 seconds until the milk is smooth and has increased in volume by about a third
- Tap the jug on the counter twice and swirl to pop any remaining large bubbles
Verdict
The cheapest and quickest method. Produces decent foam — not true microfoam, but close enough for everyday lattes. The Aerolatte (about £12 from Lakeland) is the classic choice and has been going for years. Rechargeable models from brands like Zulay and PowerLix work equally well.
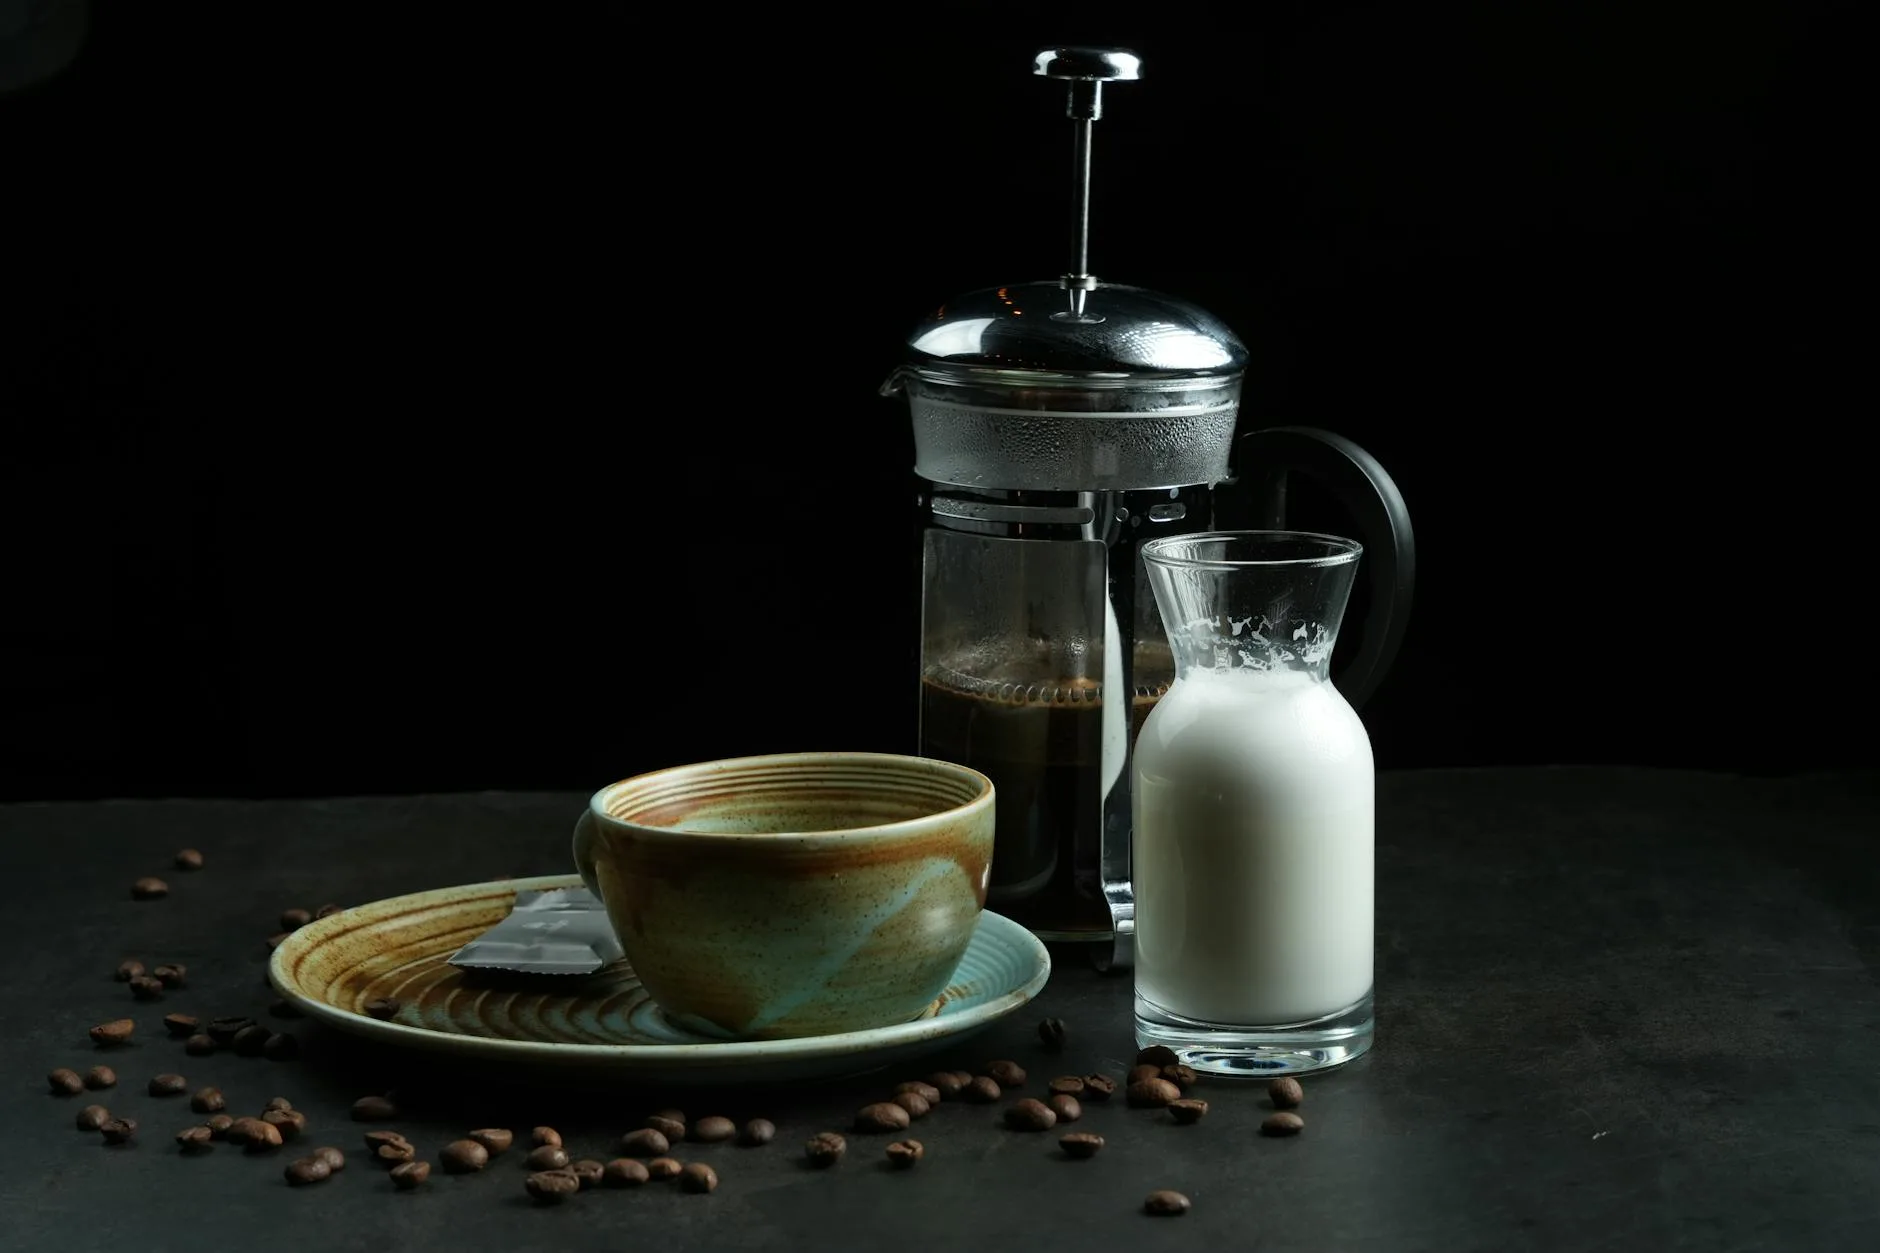
Method 2: French Press
What You Need
A clean French press (cafetière) and hot milk. You probably already own one — and if you’re also looking at upgrading your coffee machine, some come with built-in frothers — making it the cheapest upgrade possible.
How to Do It
- Heat the milk to 60-65°C
- Pour into the French press — no more than a third full (the milk triples in volume with vigorous plunging)
- Insert the plunger and pump it up and down rapidly for 20-30 seconds. Use short, sharp strokes keeping the plunger near the surface initially to incorporate air
- Once the milk has roughly doubled in volume, push the plunger slowly to the bottom — this compresses the foam and breaks up large bubbles
- Let it sit for 30 seconds, then swirl the press gently
- Pour immediately — French press foam separates quickly
Verdict
This method produces surprisingly good foam — among the best of the non-machine options. The plunger action creates smaller, more uniform bubbles than a handheld frother. The downside is cleanup — milk residue in a cafetière is harder to clean than a simple jug, and you’ll want a dedicated press if you also use one for coffee. After testing all five methods over several weeks, the French press consistently produced the best texture.
Method 3: Electric Milk Frother Jug
What You Need
A dedicated electric milk frother — a jug with a built-in heating element and whisk. The Dualit (about £50-70 from John Lewis), Nespresso Aeroccino (about £60-80), and Lavazza MilkUp (about £40-50) are the popular options in the UK.
How to Do It
- Pour cold milk into the jug up to the marked line
- Select hot froth, cold froth, or hot milk (no froth) — most have these three options
- Press the button
- Wait 2-3 minutes — the machine heats and froths automatically
- Pour
Verdict
The most consistent results with zero skill required. The machine handles temperature and frothing automatically, so you get the same quality every time. The Aeroccino produces genuine microfoam that’s good enough for basic latte art. The downside is cost — £50-80 for a single-purpose appliance — and you’re limited to the jug capacity (typically 120-250ml of frothed milk per cycle).
Worth it if you make milk-based coffee drinks daily. Overkill if it’s a weekend-only thing.
Method 4: Jar and Microwave
What You Need
A glass jar with a lid (an old jam jar works perfectly) and a microwave.
How to Do It
- Pour cold milk into the jar — no more than a third full
- Screw the lid on tightly
- Shake vigorously for 30-60 seconds until the milk has doubled in volume and the foam looks thick
- Remove the lid and microwave for 30-45 seconds on high — the heat stabilises the foam so it doesn’t collapse
- Pour or spoon the foam onto your coffee
Verdict
Free, requires no special equipment, and works better than it has any right to. I’ve used this method on holiday when there was nothing else available, and the foam was good enough for a decent latte. The shaking creates surprisingly good foam, and the microwave step sets it so it holds its shape. The texture is closer to dry foam than microfoam, and you can’t control the temperature as precisely as other methods, but for a quick weekday morning latte it’s genuinely effective. Every kitchen has a jar — try it once before spending money on equipment.
Method 5: Stovetop and Whisk
What You Need
A small saucepan, a balloon whisk (or ideally a small sauce whisk), and a hob.
How to Do It
- Pour milk into a small saucepan — a smaller pan makes whisking easier
- Heat on medium, whisking continuously with rapid back-and-forth motions
- As the milk warms, tilt the pan slightly so the milk pools on one side, giving the whisk more room to incorporate air
- Continue until the milk reaches 60-65°C and has a layer of foam on top
- Remove from heat immediately — overshooting the temperature is easy with this method
- Let it sit for 20 seconds, then tap the pan on the counter to settle
Verdict
The most effort of any method and produces the least consistent foam. The advantage is you can heat and froth simultaneously, and you don’t need any specialist equipment. Useful as a backup when your frother has flat batteries, but not something you’d choose daily.
Which Milk Works Best
Whole Milk (3.5% Fat)
The gold standard for frothing. The fat content gives richness and body, the proteins create stable foam, and the natural sweetness means you don’t need added sugar. Slightly harder to froth than lower-fat milks, but the taste and texture are unmatched. The NHS nutrition guide classifies UK whole milk at about 3.5% fat.
Semi-Skimmed (1.7% Fat)
Easier to froth than whole milk — less fat means proteins can stabilise bubbles more easily. The foam is lighter and less creamy. Most UK households have semi-skimmed in the fridge, making it the practical default. Good enough for everyday drinks.
Skimmed (0.1% Fat)
Creates the most volume of foam — the proteins have nothing competing with them. But the foam is thin, dry, and lacks body. Tastes watery in coffee. Use only if you specifically want a low-fat option.
Full-Fat Jersey or Guernsey Milk
Higher fat content (about 5%) than standard whole milk. Makes remarkably rich, creamy foam but less of it. Hard to create volume, but what you get is luxurious. Available from Waitrose, Ocado, or direct from farms.
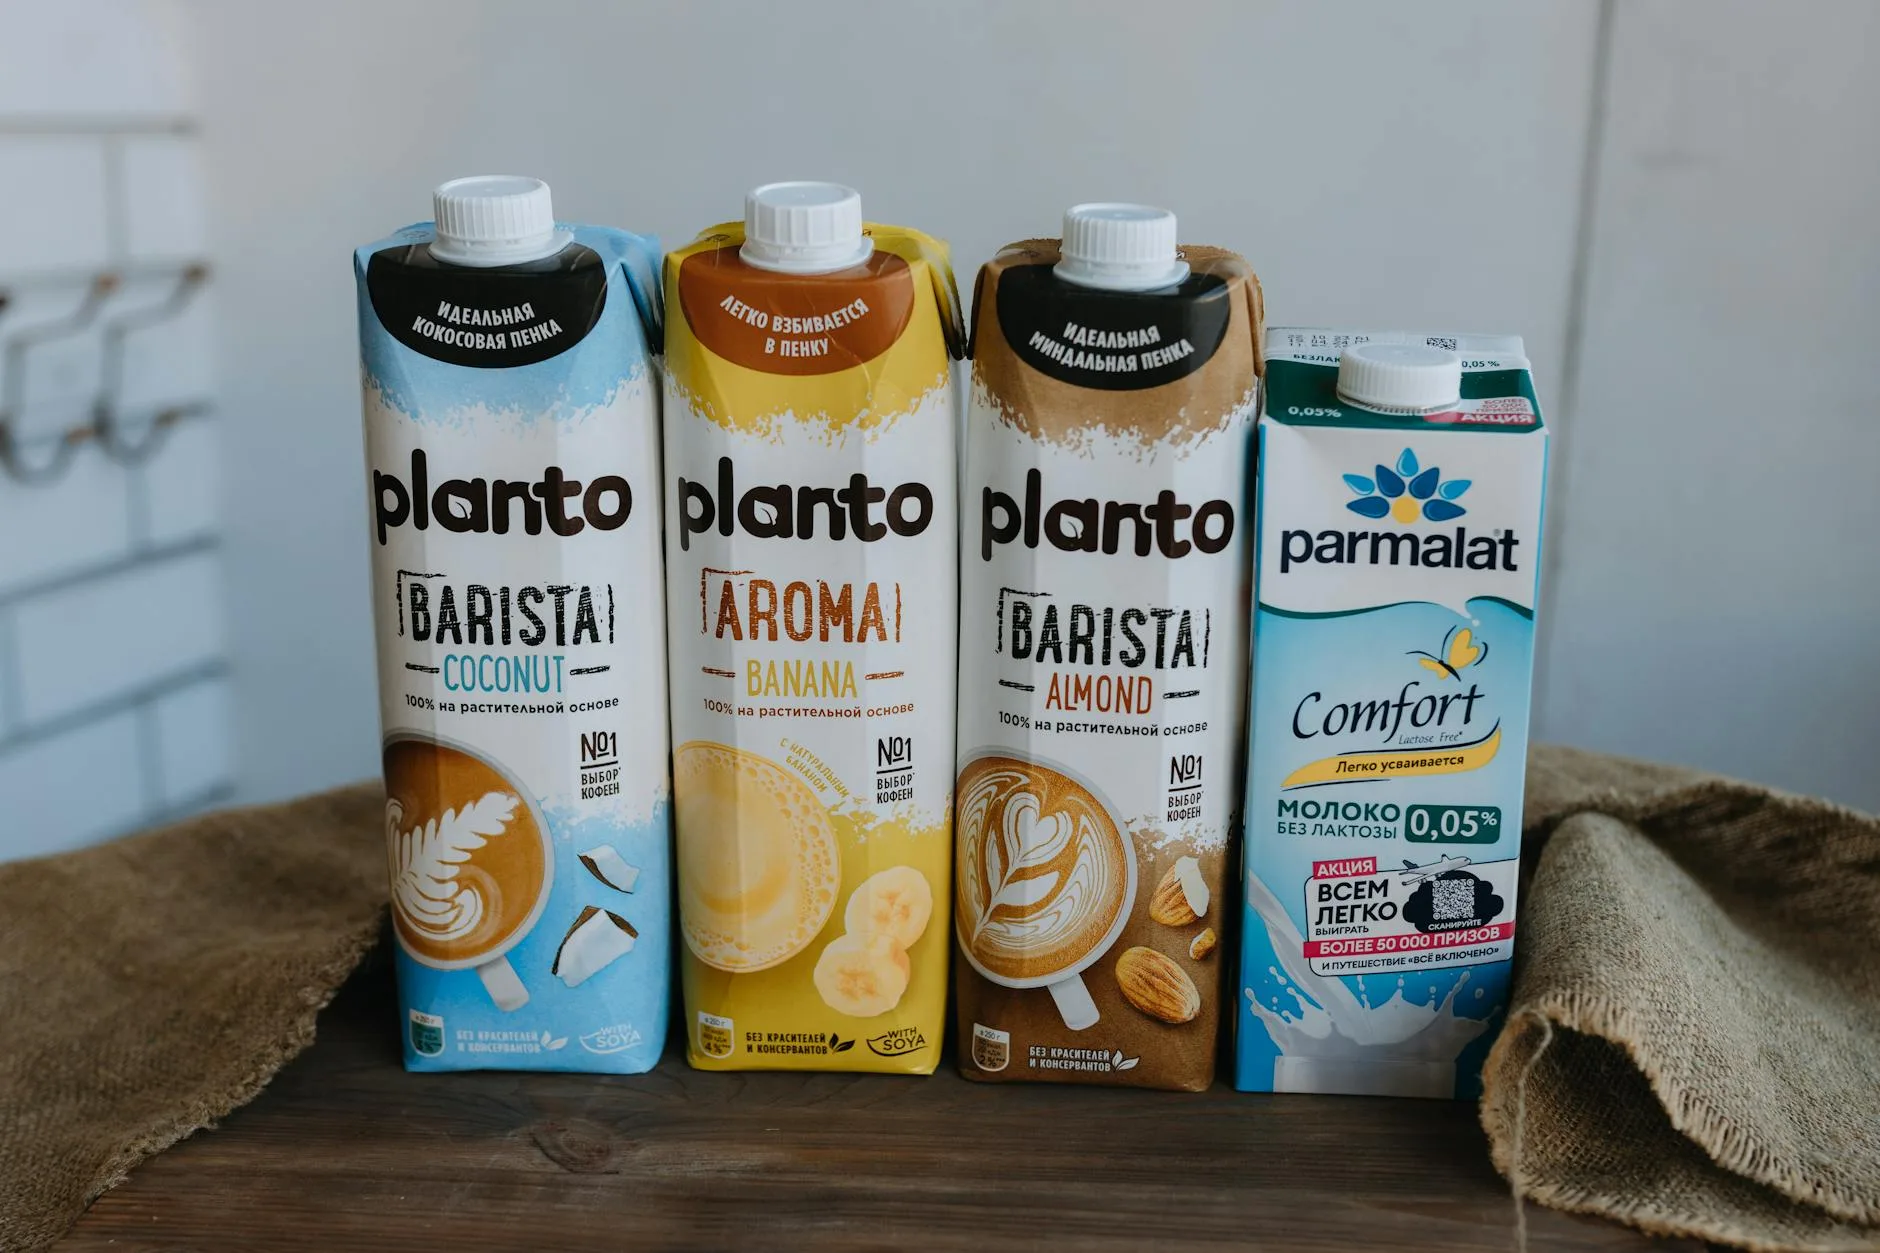
Plant Milk Frothing Guide
Plant milks are trickier to froth because they lack the casein proteins that stabilise foam in dairy milk. Some work well, others collapse the moment they hit coffee.
Best for Frothing
- Oat milk (barista edition) — the best plant milk for frothing by a wide margin. Barista versions from Oatly, Minor Figures, and Alpro contain added oils and stabilisers specifically for frothing. Creates stable, creamy foam that holds its shape. Standard oat milk froths poorly — always buy the barista version
- Soy milk — good protein content creates stable foam. Can curdle in acidic coffee if the temperature is too high — heat gently to 55-60°C maximum
Acceptable
- Coconut milk (barista) — froths reasonably well in barista versions. Adds a coconut flavour that works in some drinks but overwhelms others
- Almond milk (barista) — hit and miss. Some brands froth decently, others separate. Alpro’s barista almond is the most consistent in the UK
Avoid for Frothing
- Rice milk — too thin, almost no protein. Won’t hold foam
- Hemp milk — interesting flavour but terrible frothing properties
- Standard (non-barista) versions of any plant milk — they lack the added stabilisers that make frothing possible
Temperature Matters More Than You Think
The Ideal Range
55-65°C is the frothing sweet spot. Within this range:
- 55°C — minimum temperature for proteins to unfold and stabilise foam. Foam will be less stable and may collapse faster
- 60°C — the sweet spot. Good foam stability, maximum natural sweetness (lactose becomes most perceptible at this temperature), no scalding risk
- 65°C — maximum safe temperature. Foam is very stable but sweetness starts declining as lactose chemistry changes
- Above 70°C — proteins denature, milk scalds, foam breaks down. The drink tastes burnt and the texture goes grainy
How to Measure
A kitchen thermometer (about £5-8 from any supermarket or Amazon UK) is the most reliable method. Clip-on thermometers designed for frothing jugs are available for about £8-12. Alternatively, touch the side of the jug — when it’s too hot to hold comfortably for more than 2 seconds, you’re at about 60-65°C.
The “Too Hot to Hold” Rule
If you can’t hold the jug comfortably, the milk is probably already at 65°C. If you can barely touch it, you’ve gone too far. This rough guide works surprisingly well once you’ve calibrated it a few times against a thermometer.
Latte Art Without a Steam Wand
True latte art requires microfoam with a very specific consistency — the texture of wet paint, with no visible bubbles. Getting there without a steam wand is challenging but not impossible.
The Basics
- Froth the milk using an electric frother or French press — these produce the closest thing to microfoam
- Swirl the jug for 10 seconds after frothing to integrate any remaining bubbles
- Pour from height first — start about 10cm above the cup to let the milk sink below the crema
- Lower the jug as the cup fills — bring the spout close to the surface for the last third
- Rock the jug gently side to side as you pour the final bit — this creates the basic heart or leaf shape
Realistic Expectations
Home frothing methods get you about 70% of the way to proper latte art. The foam from a handheld frother or jar method is usually too thick and bubbly for detailed designs. A good electric frother or French press can produce foam that works for a basic heart shape. Rosettas and tulips need true microfoam from a steam wand — no home method reliably achieves this.
Don’t let that stop you trying. Even imperfect latte art makes your morning coffee feel more intentional, and the practice improves your pouring technique for everyday drinks.
Keep reading on KitchenGearUK: Filter Coffee Machines: Why They’re Making a Comeback, Coffee Machine Types Explained: Bean-to-Cup, Pod, Filter & Espresso, How to Choose the Right Coffee Machines, Best Pod Coffee Machines 2026 UK: Nespresso & Dolce Gusto.
Frequently Asked Questions
What’s the cheapest way to froth milk at home? A glass jar and microwave — completely free if you already own both. Shake cold milk in a sealed jar for 30-60 seconds, remove the lid, and microwave for 30-45 seconds. The heat stabilises the foam. It’s not barista-quality, but it produces usable foam for everyday lattes. If you want to spend a little, a handheld frother (about £5-10) is the next step up.
Can you froth cold milk? Yes — cold frothing works with handheld frothers, French presses, and electric frothers that have a cold froth setting. Cold foam is lighter and less creamy than hot foam, but it’s perfect for iced lattes and cold coffee drinks. The foam doesn’t last as long as hot foam because cold proteins are less effective at trapping bubbles.
Why does my frothed milk taste burnt? The milk has been heated above 70°C. At this temperature, milk proteins denature and lactose caramelises in an unpleasant way. Use a kitchen thermometer and aim for 60-65°C maximum. If you’re using a microwave, heat in 15-second bursts and check the temperature between each one — microwaves heat unevenly, and the milk can be scalding in one spot and lukewarm in another.
Which plant milk froths best? Oat milk barista edition (Oatly, Minor Figures, or Alpro) is the clear winner. It contains added oils and stabilisers that mimic dairy milk’s frothing properties. Always buy the barista-specific version — standard oat milk won’t hold foam. Soy milk is the second-best option due to its relatively high protein content, but it can curdle in very acidic coffee.
Is a handheld frother or French press better for frothing? A French press produces better, more consistent foam — the plunging action creates smaller, more uniform bubbles than a spinning whisk. However, a handheld frother is faster (15 seconds vs 30+ seconds), easier to clean, and takes up less space. For daily use, a handheld frother wins on convenience. For weekend coffee when you want the best possible foam, use the French press.