Looking after a stand mixer is mostly about three habits: clean the food traps, keep the beater height right, and stop asking the motor to do work it was not built for. Stand mixer maintenance care is not complicated, but ignoring the small stuff is how you end up with grey residue in cake batter, a bowl that never locks properly, or a mixer that walks across the worktop when kneading dough.
In This Article
- The Stand Mixer Maintenance Care Routine That Actually Matters
- Cleaning the Bowl, Tools and Mixer Body After Use
- Checking Beater Height, Bowl Lock and Attachment Fit
- Protecting the Motor When Kneading Dough
- Storage, Cables and Keeping Attachments Together
- When to Service, Repair or Replace Parts
- My Maintenance Schedule for a UK Home Kitchen
- Frequently Asked Questions
The Stand Mixer Maintenance Care Routine That Actually Matters
Most stand mixer problems start small. Flour packs into the hinge. Batter dries around the beater shaft. The bowl base gets sticky and stops seating cleanly. Someone uses speed six for bread dough because they are impatient. None of that looks serious on day one. After a year, the mixer feels rougher, louder and less pleasant to use.
The good news is that daily maintenance takes about two minutes after baking. The deeper checks take ten minutes every few months. That is a fair trade when a decent stand mixer costs £250-£600 and the premium models can go well past £700.
The three things worth caring about
If you do nothing else, focus on these:
- Food residue: clean the shaft, spring, bowl lock and attachment edges before dried batter turns into kitchen cement.
- Mechanical fit: check the bowl locks firmly, the head does not wobble, and attachments sit properly on the pin.
- Motor load: respect dough speeds, bowl capacity and rest periods, especially with heavy bread or enriched dough.
This article is about maintenance, not choosing a machine. If you are still deciding what to buy, start with the KitchenGearUK guide to best stand mixers in the UK, or the brand-by-brand KitchenAid vs Kenwood vs Smeg comparison, then come back here once the mixer is on your worktop.
What you do not need
You do not need specialist sprays, abrasive pads, mystery oils or a drawer full of tiny brushes. A microfibre cloth, washing-up liquid, a soft toothbrush, a wooden cocktail stick, and a dry tea towel cover most home maintenance. A cheap soft-bristled brush is about £3-£6 from Lakeland, John Lewis or Amazon UK. That is plenty.
Do not spray cleaner straight onto the mixer body. Do not immerse the motor head. Do not oil the attachment hub because someone on a forum sounded confident. If a machine needs internal grease, that is a service job, not a Saturday morning experiment next to the kettle.

Cleaning the Bowl, Tools and Mixer Body After Use
Cleaning is where stand mixer care is won or lost. The visible bowl is easy. The annoying bits are around the attachment pin, under the tilt head, inside the spring, around the speed lever and where the bowl locks into the base.
KitchenAid’s own care advice says to wipe the mixer body with a soft damp cloth and not immerse the mixer body in water. Its stand mixer cleaning guidance also warns that some parts, including wire whips on many models, should be hand washed rather than put through the dishwasher. The exact rule depends on the coating and model, so check your manual before assuming every attachment is dishwasher safe.
After every bake
Use this order:
- Unplug first: boring, but non-negotiable when wiping near switches, pins and moving parts.
- Remove the tool and bowl: rinse before dough or icing dries hard.
- Wipe the body: use a damp microfibre cloth, then dry with a clean tea towel.
- Clean the beater shaft: work around the pin and spring with a damp cloth or soft toothbrush.
- Check the bowl base: remove flour, sugar and grease from the locking plate or twist base.
That whole routine takes less time than finding the right lid for a leftover box.
Bowls and attachments
Stainless steel bowls are the easiest to live with. Wash by hand or use the dishwasher if your manual allows it, then dry properly so the base does not leave water marks on the mixer plate. Glass bowls look lovely but are heavier, easier to chip, and less forgiving if dropped into a ceramic sink. I would only pay the extra £60-£90 for a glass bowl if you really like the look.
Attachments need more care:
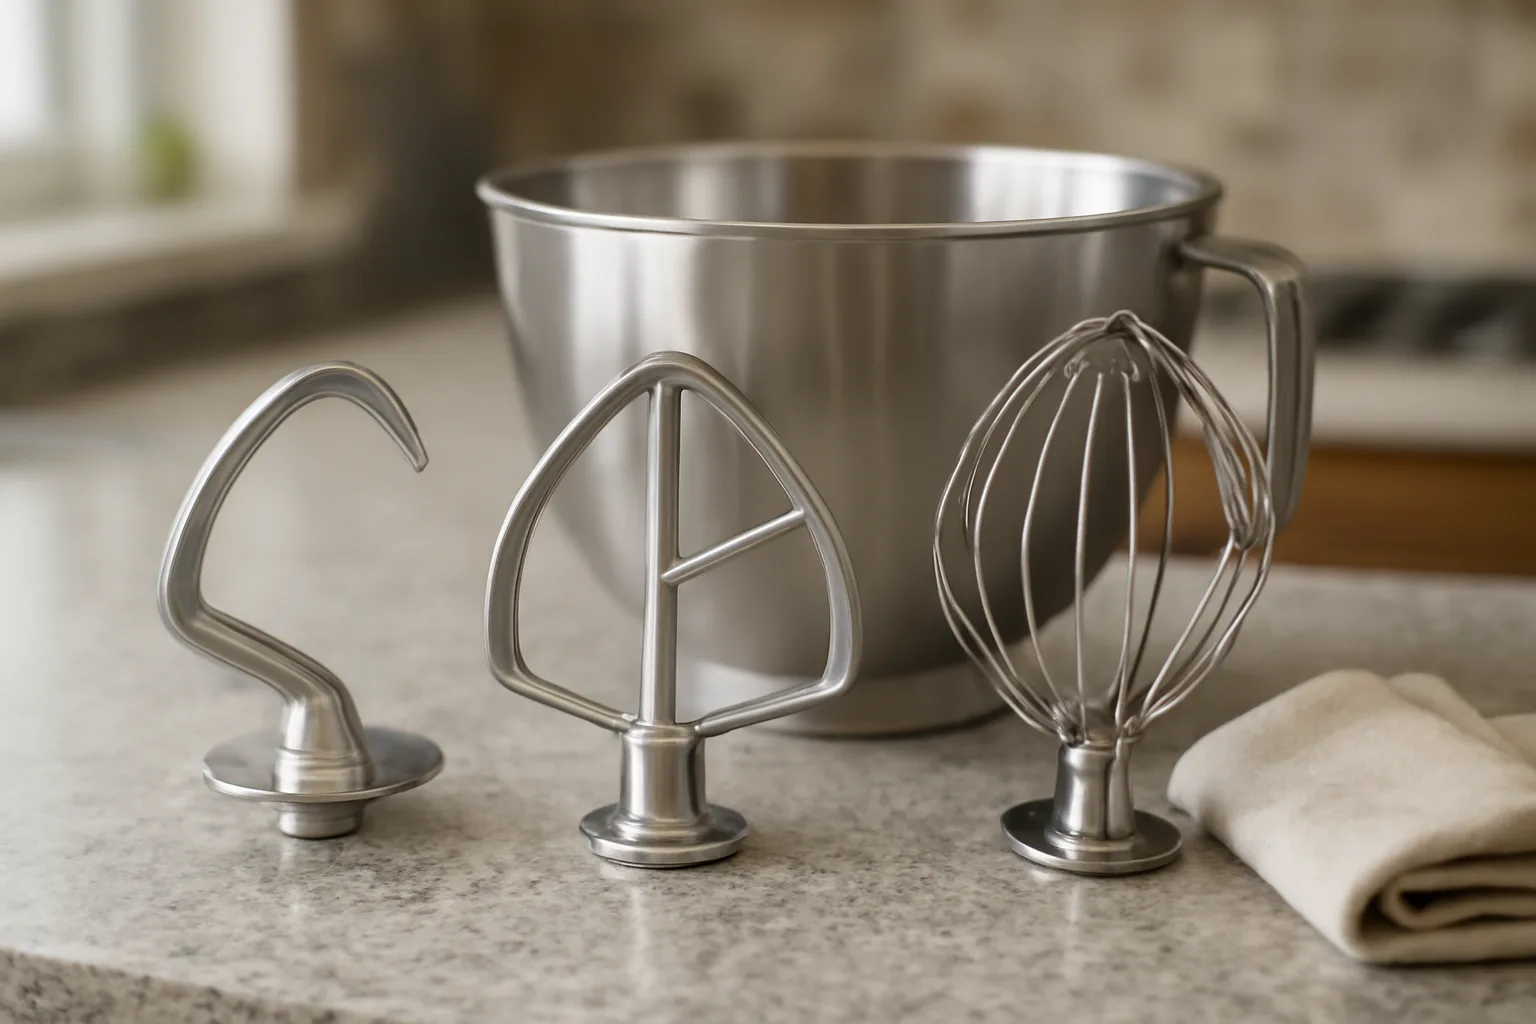
- Stainless steel tools: usually the most durable and often dishwasher safe, but still check the manual.
- Coated beaters: avoid chipped coating; replace once the coating starts flaking.
- Wire whisks: hand wash and dry carefully because trapped moisture can cause dulling or corrosion around the collar.
- Aluminium tools: hand wash only unless the manual says otherwise; dishwashers can leave grey oxidised residue.
Replacement flat beaters and dough hooks are often £18-£35, while genuine whisks can be £25-£45 depending on brand and model. That is cheaper than replacing the mixer, but annoying if the damage was avoidable.
Checking Beater Height, Bowl Lock and Attachment Fit
A mixer can look clean and still perform badly if the beater height is wrong. If the flat beater sits too high, it leaves butter and sugar smeared around the bottom of the bowl. If it sits too low, it scrapes, chips coating or puts unnecessary strain on the head.
Signs the beater height needs attention
Look for these clues:
- Unmixed ingredients at the bottom: butter, flour or sugar stays in a ring under the beater.
- Scraping noise: the beater catches the bowl even on low speed.
- Grey marks: metal contact may be happening, especially with older bowls or damaged coated tools.
- Wobbly head movement: the tilt head bounces more than normal under load.
Many tilt-head mixers have a small adjustment screw near the hinge. Bowl-lift models use a different adjustment point. Do not guess: check the model manual first. A quarter-turn can make a bigger difference than you expect.
The coin-style test
For a tilt-head mixer, a common home check is to put a small coin in the empty bowl and run the flat beater on low. The beater should just nudge the coin occasionally, not fling it around or ignore it completely. UK coins vary in size and weight, so treat this as a rough check, not engineering calibration.
If you bake weekly, check beater height every three to six months. If the mixer has just been moved, dropped, serviced or used heavily for dough, check it sooner.
Bowl lock and attachment fit
The bowl should seat firmly. If it rocks, check for dried dough or sugar in the base. On twist-lock bowls, clean the grooves and plate. On bowl-lift mixers, check both arms and locating pins.
Attachment fit matters too. A beater that needs to be forced on is a warning sign. Clean the shaft, inspect the spring, and check whether the attachment collar is bent. If a third-party paddle cost £12 and starts sticking after a month, I would bin it before it damages a £400 mixer. Cheap accessories are not always cheap.
KitchenGearUK’s guide to stand mixer attachments is useful here because it explains which tools are meant for which jobs. Using the wrong tool is a maintenance problem in disguise.
Protecting the Motor When Kneading Dough
Dough is where stand mixers earn their space, but it is also where people abuse them. Cake batter is easy. Whipped cream is easy. A stiff bagel dough or overloaded wholemeal loaf is not.
If you regularly make bread, read the manual’s dough capacity and speed advice. Kenwood’s appliance cleaning and care guidance also stresses wiping the power unit with a damp cloth rather than letting water near the motor, and the same page is a useful reminder that the power unit is not a washable bowl. See Kenwood’s cleaning guidance for the general care principle.
Use the right speed
Most home stand mixers want bread dough on a low speed. On many KitchenAid-style machines, that means speed two for kneading. Faster is not better. It heats the motor, throws the dough around and can make the head bounce.
Watch the mixer while kneading:
- Normal: steady sound, dough gathering around the hook, slight movement under load.
- Not normal: burning smell, harsh grinding, violent walking, head jumping, or the bowl twisting loose.
- Pause-worthy: very stiff dough, warm motor housing, or flour stuck dry at the bottom after several minutes.
If the mixer struggles, stop. Scrape the bowl, let it rest for ten minutes, and finish by hand if needed. No loaf is worth cooking the motor.
Respect capacity
The recipe might fit in the bowl, but that does not mean the motor is happy. A 4.3L or 4.8L tilt-head mixer is fine for typical home loaves, cakes and biscuits. It is not the machine I would choose for double batches of stiff dough every weekend.
If bread is your main use, the KitchenGearUK guides to using stand mixer dough hooks and stand mixer bread recipes go deeper on dough behaviour. The maintenance point is simple: lower speed, smaller batches, and stop if the mixer sounds strained.
Heat and rest periods
After a heavy dough session, let the mixer cool before starting another batch. That matters more in a small UK kitchen where the appliance sits near a radiator, sunny window or warm oven. Store the mixer somewhere with airflow around it rather than wedged tight under a wall unit while still warm.
Storage, Cables and Keeping Attachments Together
Stand mixers are heavy enough that many people leave them on the counter. That is fine, but counter storage still needs a bit of thought. Flour dust, steam, hob grease and damp window areas all shorten the life of the finish and moving parts.
Best place to keep it
The best location is a dry, stable worktop with enough clearance to lift the head or bowl. If you keep it in a cupboard, make sure the shelf can handle the weight. A KitchenAid Artisan is roughly 10kg. Larger Kenwood and bowl-lift models can be heavier. Pulling that down from a high cupboard is how backs and tiles lose.
Keep the mixer away from:
- Direct hob steam: grease settles into switches and seams.
- Sink splash zones: water near vents and switches is asking for trouble.
- Window condensation: damp can mark metal tools and dull finishes.
- Trailing cable edges: heavy appliances should not be one tug from the floor.
A proper appliance mat is not necessary, but a non-slip counter mat can help if the mixer vibrates on polished stone. Expect to pay £8-£15.
Attachment storage
The worst storage method is chucking the whisk, hook and paddle into a drawer with tin openers and sharp utensils. The wires bend, coating chips, and you only notice when the cream refuses to whip properly.
I like a simple lidded box or deep drawer organiser. Lakeland, IKEA and John Lewis all sell plastic or bamboo organisers in the £8-£25 range. If your mixer lives on the counter, a cotton drawstring bag for attachments is tidier than balancing the dough hook in the bowl forever.
Do not store damp attachments inside the bowl with the lid sealed. It looks neat, but trapped moisture is not kind to metal collars.
When to Service, Repair or Replace Parts
Some maintenance belongs at home. Some does not. Cleaning, beater-height checks and replacing worn attachments are normal owner jobs. Opening the gearbox, rewiring a switch or adding grease inside the head is different territory.
Problems you can usually solve yourself
Try the simple fixes first:
- Mixture left at the bottom: check beater height and bowl seating.
- Attachment hard to fit: clean the shaft and inspect the attachment collar.
- Bowl stuck: remove residue around the base and avoid forcing it at an angle.
- Whisk not whipping well: check for bent wires or greasy residue.
If a coated paddle chips, replace it. If a whisk is bent, replace it. If the bowl base is damaged and no longer locks firmly, replace the bowl. Typical UK replacement costs are roughly £20-£45 for beaters and hooks, £25-£50 for whisks, and £50-£100 for bowls depending on size and brand.
Problems that need a repairer
Stop using the mixer and seek repair help if you notice:
- Burning smell: especially under normal cake-batter loads.
- Grinding or knocking: a new harsh mechanical sound is not “character”.
- Oil or grease dripping: occasional separation can happen on older mixers, but food-contact grease leaking into the bowl needs proper attention.
- Electrical issues: flickering power, shocks, damaged cable or switch faults.
Servicing a premium stand mixer in the UK often costs £80-£150 before major parts. For a £500 mixer, that can make sense. For a £120 budget mixer, repair may cost more than replacement.
Warranty and proof of purchase
Keep the receipt or email invoice. Many stand mixers have two to five years of warranty depending on brand and retailer. John Lewis, Lakeland, Currys and AO are usually easier to deal with if you can quote the order number quickly.
Do not open the mixer head during warranty unless the manufacturer tells you to. A ten-minute curiosity session can turn a valid claim into an awkward conversation.
My Maintenance Schedule for a UK Home Kitchen
If you use the mixer once or twice a week, this schedule is enough. If you run a home baking side hustle, scale it up and consider a heavier-duty machine.
After every use
- Unplug and wipe: body, shaft, speed lever and bowl base.
- Wash tools properly: hand wash anything your manual says should not go in the dishwasher.
- Dry before storing: especially whisks, aluminium tools and bowl bases.
Monthly
- Check the bowl lock: no rocking, sticking or residue in the base.
- Inspect attachments: look for chips, bent wires, loose collars and grey residue.
- Clean the awkward bits: hinge area, hub cover, vents and feet.
Every three to six months
- Check beater height: especially if mixtures are not combining evenly.
- Review dough habits: smaller batches if the mixer has been walking or warming up.
- Check the cable: no kinks, splits, scorch marks or crushed areas.
The bottom line: how to care for and maintain your stand mixer is mostly prevention. Keep it clean, keep the attachments in good shape, avoid overloading it, and fix small fit problems before they become expensive noises.
Frequently Asked Questions
Can stand mixer attachments go in the dishwasher? Some can, but not all. Stainless steel tools are usually safest, while wire whisks, aluminium tools and some coated attachments often need hand washing. Check your exact model manual.
How often should I adjust the beater height? Check it every three to six months if you bake regularly, or sooner if ingredients are left at the bottom of the bowl, the beater scrapes, or the mixer has been moved heavily.
Should I oil my stand mixer? No, not as routine home maintenance. External oiling can attract dirt or contaminate food areas. Internal grease work should be handled by a proper repairer unless your manual says otherwise.
Why does my stand mixer move when kneading dough? The dough may be too stiff, the batch too large, or the speed too high. Stop, scrape the bowl, reduce the load if needed, and use the low dough-kneading speed recommended by the manufacturer.
When is a stand mixer worth repairing? A premium £400-£700 mixer is often worth servicing if the motor and body are sound. A budget mixer may not be worth an £80-£150 repair unless the fault is a cheap replacement part.